
How to Customize Your Client Project Dashboard
.jpg)
Build with Retainr
Sell your products and services, manage clients, orders, payments, automate your client onboarding and management with your own branded web application.
Get Started1. How can I customize my client project dashboard?
Basic Steps in Customizing Client Project Dashboard
Customizing your client project dashboard involves several straightforward steps. Begin by identifying your client's needs and the specific data that needs to be tracked. This will guide your customization process. Then:
- Access the dashboard settings: You can usually find this in the main menu, represented with a gear or wrench icon
- Select the 'Customize Dashboard' option: This allows you to modify the existing layout
- Choose the report widgets: Add, remove or rearrange widgets according to your client's requirements
Adding Specific Data Elements
Aside from the layout and widget modification, you have the option to tailor dashed elements to your client's preferences and project's needs. To do so:
- Click on 'Add element'
- Select the type of data you want to add such as charts, task lists, or time trackers
- Adjust the data parameters to fine-tune the information displayed
Assigning User Roles and Access
Another crucial customization aspect is determining who can access and modify the dashboard. Also, setting their level of accessibility is important. Use the following HTML table to understand the common user roles:
| User Role | Access Level |
|---|---|
| Admin | Full access including customization and user role assignment |
| Team Member | Can view and modify projects but not the dashboard |
| Client | Typically, view-only access to the project dashboard |
2. What things can be customized in a client project dashboard?
Customizing Dashboard Elements
There are many elements on a client project dashboard that you can customize to make it more effective and useful. Some of these include:
- Project Timeline/Milestones: This allows you to track the progress of the project, see what tasks are complete and which ones are pending.
- Task Management Features: Customizable task management features enable you to delegate tasks, set deadlines, and monitor progress.
- Communication Tools: These features let you communicate with your team members directly within the dashboard. For instance, you could create discussion threads or real-time chat options.
- Data Reports & Analytics: You can customize these to monitor different aspects of your project and track key metrics.
Customizing Dashboard Views
Depending on the role of the user, the view of the dashboard can also be customized. For example:
| User Type | Customized View |
|---|---|
| Project Manager | View of overall project status, team productivity, task allocations, and deadlines. |
| Team Member | Assigned tasks, deadlines, project updates, and a way to communicate with other team members. |
| Client | Progress of the project, milestones achieved, and financial aspects like billable hours or costs incurred. |
Customizing Dashboard Layout and Design
Another aspect of customization includes the layout and design of the dashboard. This encompasses the overall look and feel of the dashboard, as well as how information is structured and displayed. Aspects of layout and design customization could include:
- Colors and Themes: Match the dashboard design with your brand colors or use colors to distinguish different tasks and timelines.
- Logo and Branding: Include your company logo and brand name on the dashboard.
- Layout: Design the layout according to your preferences. Would you like two columns or three? Do you want the project timeline at the top or bottom of the page?
3. Can I add custom fields to my client project dashboard?
Adding Custom Fields to Your Client Project Dashboard
You are able to add custom fields to your client project dashboard. The exact steps may vary slightly depending on the specific project management software you are using, but the general steps are very similar.
The following are general steps to add custom fields to your client project dashboard:
- Access the dashboard settings or configuration page. Look for an area labeled 'Fields', 'Custom Fields', or something similar.
- Once you're in the right section, there should be a button or option to 'Add' or 'Create' a new field. Click on this button.
- Provide a name and description for your custom field. Depending on your software, you might also be able to specify other things like the field's type (text, number, date, etc.) and whether it's required.
- When you're ready, save or apply your changes. Your new custom field should now appear somewhere on your dashboard.
Custom Fields Table Example
If you want to maintain a record of all custom fields you have added to your client project dashboard, you can use a table. Here's an example:
| Field Name | Field Type | Description | Is Required? |
|---|---|---|---|
| Project Deadline | Date | The deadline date of the project | Yes |
| Client Feedback | Text | A space to record feedback from the client | No |
4. How can I arrange the information on my client project dashboard to suit my needs?
Arranging Dashboard Elements Strategically
Arranging your dashboard starts with understanding your tasks, deadlines, and priorities. Always put the most important information where it’s easiest for you to see. This might be at the top of your dashboard or in the center. If your dashboard supports it, you could use areas with different colors or highlights for high-priority items.
- Tasks: Arrange tasks in order of their deadlines.
- Milestones: Highlight milestones to clearly see what needs to be done to reach them.
- Status Updates: Keep status updates visible to remain aware of task progress.
- Notifications: Prioritize notifications to stay up-to-date with project changes.
Using Dashboard Customization Features
Many dashboards have built-in customization features. You can use these to move around panels or widgets, create new ones, or delete ones you don’t need. Additionally, you may be able to customize the design and appearance of your dashboard. You might want to use specific colors or fonts for different clients or types of information.
| Client | Color | Font |
|---|---|---|
| Client A | Blue | Arial |
| Client B | Green | Verdana |
| Client C | Red | Times New Roman |
Organizing Information through Categorization
Categorizing the information and arranging them based on their categories can be a good starting point. Categorization can help you sort out your client information, project timelines, financials, or document sections. The categorization could be according to the project status, project priority, or client groupings and so on. For example -
- Project Status:
- Upcoming, Ongoing, Completed
- Project Priority:
- High, Medium, Low
- Client Groupings:
- VIP Clients, Regular Clients, Lower Priority Clients
5. Is there a way to change the colors or theme of my client project dashboard?
Changing Colors or Themes on Your Client Project Dashboard
Most client project dashboards are designed to be customizable, including the ability to change colors and themes. This option is mainly for the purpose of enhancing user experience and optimizing system usage. However, the degree of customization, including the choice of colors and themes, depends on the specific dashboard application that you are using. Below are generally the steps to change colors or themes on your client project dashboard:
- Navigate to the settings or preferences menu of your dashboard. This is usually marked with a gear or similar icon.
- Locate the appearance or display options. This could be a subsection on its own or intertwined with other settings.
- Select the color or theme option. This is where you can pick your preferred hues or theme to reflect on the dashboard. After changing the color or theme, ensure to save the alterations.
Customization Options for Different Dashboard Applications
Different client project dashboard applications offer varying customization options. While some provide full RGB spectrum to choose from, others might offer a few pre-set color themes. Here's a comparison of customization options that some popular dashboard applications offer:
| Dashboard Application | Color Customization | Theme Customization | >
|---|---|---|
| Trello | Yes(Full spectrum) | Yes |
| Asana | Limited (Pre-set themes) | Yes |
| Jira | Yes (Full spectrum) | No |
6. How can I display specific information for each client on the project dashboard?
Adding Specific Client Information
Displaying specific information for each client on the project dashboard can significantly enhance your client's engagement and help to deliver even more value. One way to do this is by creating custom fields. This option allows you to add additional columns that can store extra information about your client. For example:
| Fields | Examples |
|---|---|
| Text | Client's company name, contact person |
| Number | Client's company size, budget |
| Date | Contract start date, end date |
Implementing Tags for Client Projects
Another useful tool for customizing your client project dashboard is the use of tags. Tags allow you to group and categorise your client projects in any way you need, for instance:
- By client industry (e.g., "healthcare", "education", "finance")
- By project type (e.g., "web development", "mobile app", "marketing campaign")
Utilizing Project Widgets
Lastly, by making use of project widgets, you can further customize your client dashboard. These are customized sections of your dashboard that can display various types of information, which could include:
- Recent Activity: Shows the most recent updates or changes made in the project.
- Task List: Displays all tasks that need to be accomplished in the project.
- Calendar: Shows the project timeline, including deadlines and important dates.
7. How do I add or remove items from my client project dashboard?
Adding Items to Your Client Project Dashboard
To add an item to your client project dashboard, follow the steps listed below:
- Access the dashboard by logging into your account and navigating to the 'Client Project' section.
- Locate and select 'Customize Dashboard' from the menu options available on the page.
- An 'Add Items' pop-up box should appear, detailing the possible items or widgets you can add to your dashboard. This may include options for adding task lists, project timelines, progress trackers and more.
- Select the item you wish to add from this list by clicking the checkbox next to the item's name.
- Once you've chosen all items to add, click the 'Add to dashboard' button at the bottom of the 'Add Items' box.
Organizing Your Dashboard
To reorder items on your dashboard, simply hover over the item you wish to move until your cursor changes to a hand icon, then drag and drop the item in your desired location. To change the size of an item, locate the bottom-right corner of the item box, click and drag until your desired size is achieved.
Removing Items from Your Client Project Dashboard
To remove items from your client project dashboard, follow the below process:
- Navigate to the 'Customize Dashboard' option once again.
- Select the 'Remove Items' option this time. Similar to the 'Add Items' option, a list of all items currently on your dashboard will appear.
- Locate the item you wish to remove and uncheck the box next to its name.
- After you've unchecked all the items you want to remove, confirm your changes by clicking 'Remove from dashboard'.
8. Can I save different customizations for different client project dashboards?
Saving Different Customizations for Each Dashboard
You can definitely save a variety of dashboard customizations specifically tailored to each client project. This allows each dashboard to be unique and better cater to the different requirements and style preferences specific to each client or project. To do this, simply follow these step by step instructions.
- Select your desired client project from the 'Projects' dropdown menu.
- Click on the 'Customize Dashboard' link located usually in the 'Settings' section.
- Modify, adjust and tailor the dashboard according to the specific needs and preferences of the project or client.
- Once you're satisfied with the changes, click on the 'Save Customization' button to save the layout and settings specifically for this particular dashboard.
Overview of Dashboard Customizations
There are various options available when customizing client project dashboards. These include settings like widget modifications, theme adjustments, and display features. For example, you can alter the data represented, add or remove widgets, adjust visual elements like colour and font size, or change the arrangement of widgets. Here's a simple table summarising some of the key customizable features:
| Feature | Customizable Options |
|---|---|
| Widgets | Add, remove, resize, move, adjust data settings |
| Visual Elements | Change theme, colours, font size and styles |
| Display Features | Grid size, widget snapping, full-screen mode |
9. How can I keep track of various projects for different clients using the dashboard?
Managing Multiple Projects on the Dashboard
Keeping track of various projects for different clients using the dashboard is simple and straightforward. The first step is to create and maintain separate project boards for each client. Let's break this down further:
- Create a new project board and name it after the client or project. This will make it easier to quickly locate and manage client-specific tasks.
- Next, add relevant tasks or milestones to the project board. Be sure to add due dates, assign responsibility, and include any necessary task details.
- Finally, customize the board to fit the specific needs and workflow of each project. You can add custom fields, use labels to categorize tasks, and utilize filters to quickly view tasks based on various criterias.
Tracking Project Progress
Once you have your project boards set up, tracking progress is a breeze. Here are some ways you can use the dashboard to keep an eye on your projects:
| Method | Description |
|---|---|
| Task Status | Check the status of individual tasks. Tasks can typically be marked as to-do, in progress, or completed. |
| Due Dates | Keep track of due dates to ensure tasks are being completed on time. Most dashboards will provide reminders for upcoming due dates. |
| Project Overview | Get a high-level view of the project's progress. Many dashboards offer progress charts or percentages so you can quickly see how much of the project is complete. |
Prioritizing Tasks
Lastly, your dashboard can help you prioritize tasks to ensure the most important ones are being completed first. Here's how:
- Add a Priority field to your tasks. This could be as simple as low, medium, and high or you could create your own system that works for your projects.
- Use filters or sorting features to view tasks based on priority. This quick view can help you easily see what needs to be addressed first.
- Regularly review and update task priorities. As projects evolve, the priority of certain tasks may change. Make sure your dashboard reflects these changes.
10. Are there any tutorials or guides on how to customize the client project dashboard?
Locating Tutorials and Guides
Customizing your client project dashboard can be complex and sometimes a little daunting. However, there are various tutorials and guides available that provide a detailed step-by-step process. These resources are accessible through different platforms such as YouTube, tech blogs, online courses like Udacity, Udemy, or platforms like LinkedIn Learning. There are also comprehensive guides available on websites like GitHub, StackOverflow, and W3schools. They can help you understand how to efficiently manage, arrange and customize your client project dashboard according to your preferences.
Using Video Tutorials
Video tutorials are quite useful and provide a visual demonstration of the process. Some popular and helpful YouTube channels to consider include:
- Smartsheet
- Asana
- Teamwork
Remember, the channel selection would depend on the specific client project dashboard you are using. Besides, online learning platforms also offer courses which often include project management tools customization. While some courses may be paid, others may be available for free.
Written Guides and Community Help
If you prefer written guides over videos, tech blogs, GitHub, StackOverflow, or W3schools can be great resources. Depending on the dashboard tool you're using, the documentation available on the official website can also provide essential customization details. Communities like:
| Resource | Link |
|---|---|
| StackOverflow | https://stackoverflow.com/ |
| Github | https://github.com/ |
| W3schools | https://www.w3schools.com/ |
offer a platform to ask questions and often experienced tool users or even the tool creators themselves provide insightful answers and solutions. Just ensure you provide detailed information about your challenge to get the most helpful response.
Conclusion
Create Your Own Client Project Dashboard
Streamlining project management and maintaining clear communication with clients can be daunting tasks. Through modern software, one can personalize client project dashboards, making these tasks more manageable. Convenient tools are a click away. One such tool is Retainr.io.
Dashboard Customization
The versatility of a client project dashboard has to be exploited to the fullest. Customization can include modifications such as altering views and preferences, displaying essential metrics and even incorporating the brand’s colors and logos. This portrays an image of professionalism while enhancing customer interaction and experience. Customized dashboards provide users with immediate access to crucial information and analytics, helping them to manage projects and make informed decisions.
Take Advantage of Retainr.io
You can rely on the state-of-the-art whitelabel software, Retainr.io, to craft the perfect client interface. With Retainr.io, you can effortlessly sell, manage clients, orders, and payments with your own branded app. This trusted software ensures that you can present your clients with an efficient, user-friendly dashboard tailored to their needs and preferences. This contributes greatly to an exceptional customer experience.
Redefine your client interaction by embracing the array of benefits Retainr.io has to offer - harness the power of customization today to create an exceptional client project dashboard. Visit our website and start personalizing your dashboard now.
Boost Your Agency Growth
with Retainr Accelerator
Uncover secrets, strategies, and exclusive blueprints to take your agency's growth to the next level — from marketing insights to effective presentations and leveraging technology.

SOPs, Cheatsheets & Blueprints
Leverage 50+ SOPs (valued over $10K) offering practical guides, scripts, tools, hacks, templates, and cheat sheets to fast-track your startup's growth.
Connect with fellow entrepreneurs, share experiences, and get expert insights within our exclusive Facebook community.
.jpg)
Join a thriving community of growth hackers. Network, collaborate, and learn from like-minded entrepreneurs on a lifelong journey to success.
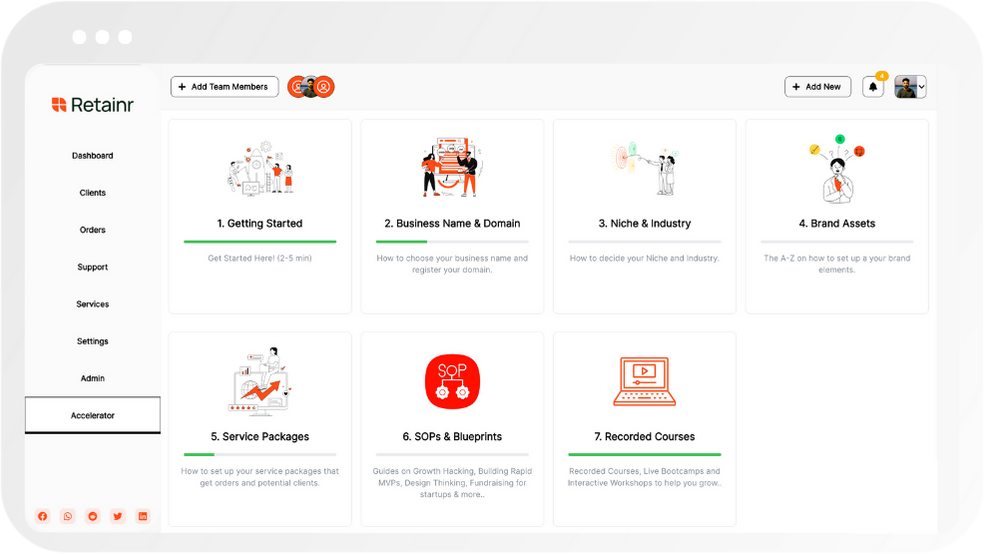
Gain expertise with recorded Courses, Live Bootcamps and interactive Workshops on topics like growth hacking, copywriting, no-code funnel building, performance marketing and more, taught by seasoned coaches & industry experts.

.jpeg)


