
10 Ways to Customize Your Client-Facing Interface
.jpg)
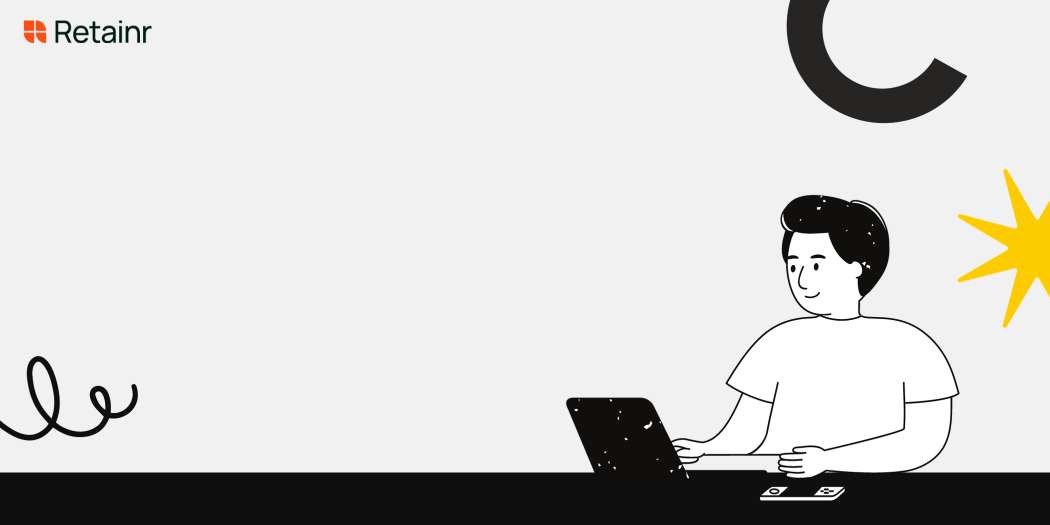
Build with Retainr
Sell your products and services, manage clients, orders, payments, automate your client onboarding and management with your own branded web application.
Get Started1. What are the top ten ways to customize my client-facing interface?
Initial Steps for Customizing Client-Facing Interface
Firstly, there are several crucial steps to consider during the customization of your client-facing interface.
- Branding: Use your company's logo, colors, and other brand elements to personalise the interface.
- Layout: Adjust the layout to match your clients’ workflow and make navigation intuitive.
- Language and Localization: Cater to your multinational clients by localizing content to their native languages.
Adding Further Customization
Next, add further personality and interaction to boost user engagement.
- Interactive Elements: Include interactive elements such as sliders or drag-and-drop features for a fun, hands-on experience.
- Chat Support: Providing a live chat support not only adds functionality, but it's also an excellent way to boost customer service.
- User Profile Personalization: Enable users to customize their profiles on the platform.
Final Touches of Customization
| Customization Type | Description |
|---|---|
| Visual Feedback | Add elements such as progress bars or loading animations to communicate system status. |
| Integration with Other Platforms | Include integrations with popular platforms and tools that your clients use. |
| Custom Reports | Provide clients with the ability to create custom reports, so they only see the data that's relevant to them. |
2. How can I adjust the layout of my client-facing interface?
Understanding Layout Customization Options
The layout of your client-facing interface can significantly impact user experience. There are several ways to adjust this, depending on the tools and functionality offered by your interface builder. Firstly, you can use CSS and HTML to alter your layout. For instance, the flexbox module in CSS allows you to improve control over item alignment and distribution within a container. Secondly, you can utilize various pre-designed templates if your interface builder supports it. Thirdly, responsive layout design can be employed to ensure your interface is optimized for all devices.
Using HTML and CSS for Layout Customization
HTML5 and CSS3 provide powerful tools for customizing the layout of your client-facing interface. You can make adjustments by manipulating the 'div' tags and CSS properties. Following are a few examples:
- 'Display: flex;' property in CSS can be used to make a flexible layout.
- 'Grid-template-columns: auto auto auto;' can be implemented for defining the number of columns you need in your layout.
- 'Margin: auto;' property aids in centering the layout.
Utilizing Templates for Layout Adjustments
Several interface builders offer pre-designed templates to make your task easier. These templates can be customized according to your liking or specific requirements. Here is a basic example illustrating the structure of a template:
| Section | Description |
|---|---|
| Header | Top portion featuring the website title/logo, navigation menu, and possibly some contact information. |
| Main Content | Area where all the main content resides. This can be divided into different modules like main content, sidebars, sliders, etc. |
| Footer | Bottom section usually housing important company information, legal matters, social media links, etc. |
3. Can I add my own logo and brand colors to the client-facing interface?
Customizing Logo and Brand Colors
You certainly can customize not just the user interface but also add your own logo and brand colors, making your client-facing interface unique to your brand. This feature offers a cohesive look to your app or website, enhancing your brand recognition among your clients. Here are the steps to customize your logo.
- Login into your account and go to the 'settings' menu.
- Select the ‘Customize Interface’ option.
- Click on ‘Upload Logo’ and choose the image file from your device. It's best to use a high-resolution image for better visibility.
- Save the changes. You have now successfully added your own logo.
Changing Brand Colors
Just like the logo, changing brand colors is also a straightforward process. Keep the hexadecimal code of your brand color ready before you start the process. Below is a step-by-step guide of how you can do it.
| Step | Action |
|---|---|
| 1 | Go to the 'settings' menu. |
| 2 | Choose 'Customize Interface' option. |
| 3 | Click on 'Brand Colors'. |
| 4 | Enter the hexadecimal code of your color in the given space. |
| 5 | Click 'Save' to implement the changes. |
After successfully saving the changes, your client-facing interface should now reflect your brand colors, providing a uniform look and enhancing your client's experience.
4. How can I personalize the language and tone of my user-facing interface to better match my brand?
Choosing Your User Interface Language
The choice of language for your user interface should be tailored to your brand identity and reflect the cultural, professional, or social context of your user base. It's typically best to use clear, concise language to maximize its accessibility to users. However, you can also incorporate more specialized language to create a distinct voice that mirrors your brand.
- Neutral/broad-spectrum language: This includes everyday, commonly-used words and phrases that general audiences can understand.
- Industry-specific language: This includes technical jargon and specialized terms that are more relevant to a specific group of users or domain.
Setting the Tone of your User Interface
Your software's tone of voice should be consistent in all elements of the user interface, from error messages to menu labels. The nature of your business, its branding, and the platform you’re using would dictate whether your tone is formal, casual, playful, or professional. Let's consider three types of tones below:
| Tone | Description | Examples |
|---|---|---|
| Formal | Used by businesses in industries like banking, law, and government, where information needs to sound authoritative and professional | 'Insufficient funds', 'Confirm password' |
| Casual | Adopted by brands that want to sound friendly, approachable, and human | 'Oops! Something went wrong', 'Let's do this!' |
| Playful | Used by brands to engage users and create memorable experiences | 'Uh-oh! The gremlins are back', 'Congrats! You did it' |
Personalizing Your Interface
Personalizing your interface requires a solid understanding of your target audience and branding strategy. You could even consider allowing users to customize the language or theme of the interface for a more personal touch. Here are a few ways you can personalize your interface:
- User preferences: Offer options for users to select their language preference or choose between light and dark modes.
- Regional customization: Users from different geographical areas might prefer specific fonts or color schemes.
- Show respect: Remember to respect user's data privacy and cultural sensitivities when personalizing your interface.
5. What is the process for customizing the navigation menus in my client-facing interface?
Understanding the Process
Customizing the navigation menus in your client-facing interface involves a few steps. These include identifying the menus to be edited, modifying the layout, adding or removing items, and testing the changes. It's essential to ensure that any changes do not adversely affect the overall user experience and functionality.
- Identify the Menus: Start by deciding which menus need customization. These could be the main navigation menu, sub-menus, dropdown menus, or contextual menus present in your interface.
- Modify the Layout: Edit the structure and layout of the selected menu. This involves determining the exact positioning of the menu items and adjusting appropriate alignments.
- Add or Remove Items: Depending on the requirement, add new items or remove unnecessary ones from the menu. Ensure the modified menu is clutter-free and intuitive.
- Test Changes: After making the changes, it's critical to test the menus to ensure they function as expected.
Guide to Customization
In addition, various tools and plugins are available that can help you customize your navigation menu. Choose the one that is most compatible with your platform. Once a tool is selected, follow its tutorial or guide to understand the customization process completely.
| Plugin/Tool | Platform Compatibility | Tutorial Link |
|---|---|---|
| Elementor | WordPress | Elementor Navigation Menu Tutorial |
| Bootstrap | HTML, CSS, and JS | Bootstrap Navigation Bar Guide |
| Wix | Wix | Wix Menu Button and Lightbox Guide |
Best Practices
While customizing the navigation menu, keep the user experience in mind. Focus on making the menus intuitive and easy to navigate. A well-structured and clear navigation menu can significantly enhance the user experience and interface usability.
- Use Clear Labels: Use clear and concise labels for your menu items. This helps users find what they're looking for without confusion.
- Maintain Consistency: Keep the style and structure of your menu consistent across your interface. Having different types of menus on different pages can be confusing.
- Minimalistic Design: Try to keep your menu design simple and clutter-free. Overcrowded menus can overwhelm users and reduce usability.
- Testing: Carry out usability testing to check how easy it is for users to navigate through your menu.
6. How can I incorporate personalized user information into the interface?
```htmlIncorporating Personalized User Information
Serving personalized content is a useful strategy for improving user experience. By incorporating user-specific information into the design, you ensure that the interface feels tailored to individual users. Here are three methods to achieve this:
- Dynamic content: Use scripts to fetch and display user-specific data. For example, greet the user by his/her name on login or show recent activities.
- History-based personalization: Use cookies or local storage to remember a user's history. Show product recommendations or content based on past preferences.
- User-specific settings: Allow users to customize the interface. For example, theme choice, layout preferences or defaults for how information is displayed.
Example of Personalized UI
Here is an example of a personalized user interface. When the user logs in, the page welcomes the user and displays a brief recent history of activities.
| Welcome Message | Recent Activities |
|---|---|
| Welcome back, John! | You recently viewed these items. |
| Settings: Dark Theme, Large Text, Sort by Relevance | |
7. Is it possible to customize the client interface for different user roles?
Customize Interface Based on User Roles
The interface that your clients interact with does not need to be one-size-fits-all. In fact, it’s entirely possible and highly beneficial to customize the client interface based on different user roles. Multi-tiered user roles can effectively streamline each user's experience based on their specific needs and responsibilities within your platform.
Consider the following customization strategies:
- Role-based Access: Limit the accessibility of certain features or sections to users based on their role. For example, administrators might have complete access, whereas a visitor might only have access to a few sections of your interface.
- Task-oriented Interface: Customize the interface to highlight the tools and features that are most relevant to each role. For instance, a manager's interface might prioritize reporting features, while an employee's interface might highlight task management tools.
- Adaptive Content: Deliver content that is relevant to each user's role. This could include news, updates, or personalized recommendations.
Table for Displaying Customized Access Levels
In order to clearly define accessible features based on roles, you can use a table. This provides a clear visual guide, ensuring all stakeholders have a clear understanding of their access rights.
| User Role | Accessible Features |
|---|---|
| Administrator | Complete access to all features |
| Manager | Access to reporting and task assignment features |
| Employee | Access only to task management features |
| Visitor | Limited access to essential features only |
8. How can I alter the design theme of the client-facing interface?
Choosing a Design Theme for Client-Facing Interface
Changing or customizing the design theme of your client-facing interface can create a consistent and appealing visual experience. The process involves altering aspects such as the background color, font styling, button designs, and the general layout. Take note that the options available for customization may vary depending on the platform or system you are using.
Steps to Modify the Design Theme
You can alter your design theme through these steps:
- Log into your admin account and navigate to the site customization or theme settings.
- Browse through the options available. Most platforms provide a range of default themes.
- Select your preferred theme. Keep in mind your brand image and the visual preferences of your clientele.
- Check if the chosen theme aligns well with your brand colors, font, and overall appearance.
- Apply the changes. Remember that it might take a few moments for the changes to take effect site-wide.
These steps are generic and might vary from platform to platform.
Customizing Components of the Design Theme
Besides choosing a whole theme, you might also want to customize specific components of the theme to reflect your brand identity better. Here's a table illustrating the various customizations you can perform:
| Component | Description |
|---|---|
| Background Color/Pattern | Set a color or pattern for the foreground or background to match your brand identity. |
| Font | Choose from various fonts and styles for legibility and brand alignment. |
| Buttons | Customize color, size, and shape of the buttons to promote easy navigation. |
Note that the impact of these changes depends on the overall balance with the other elements on the interface. Always aim for a harmonious and user-friendly layout.
9. Can I feature product or service promotions on my client-facing interface?
Featuring Product or Service Promotions
Featuring your product or service promotions on your client-facing interface is not only possible, but it's also a great strategy to keep your clients engaged and informed. There are a variety of ways to include promotions on your interface.
- Banner Ads: One of the most common methods is through banner ads. These are typically displayed at the top or bottom of your interface, although they can also be placed at the side. To make these visually appealing and eye-catching, consider using vibrant colors, interesting fonts, and engaging imagery.
- Pop-up Notifications: Another way is through pop-up notifications. These can be set to appear when a client logs into their account, or at certain times during their interaction with the interface. Ensure these notifications are not too intrusive and provide a clear option to close or decline.
- Product Highlights: For product-based businesses, consider having a 'Product Highlights' or 'Featured Products' section on your interface. This can promote new or top-selling products, discounts, and limited-time offers.
Implementing Promotions Into Your Interface Design
To implement these promotions into your interface, you might use a table layout to organize your 'Product Highlights'. Here is an example of how such a table might look:
| Product Name | Description | Discounted Price |
|---|---|---|
| Product 1 | A brief description of Product 1. | $50 |
| Product 2 | A brief description of Product 2. | $100 |
Customizing the Promotion Features
When including promotions on your client-facing interface, remember to prioritize user experience. The positions, appearance, and frequency of promotional features should be customized according to your audience's preferences.
- Conduct user testing or surveys to understand what works best for your audience.
- Consider the demographics of your target audience such as age group, gender, and technical expertise while designing and placing promotional content.
- Keep track of promotional content performance. This data can provide insights on improving the efficiency of these features in the future.
10. What are the best practices for implementing interactive elements into my user interface?
Interactive Elements & Their Best Practices
An interactive interface offers a visually stimulating user experience and keeps your client engaged with your software platform. There are several best practices you need to follow when implementing these interactive elements into your user interface.
Utilizing Simple Interactive Elements
- Buttons: They should be easy to identify and clickable. Make sure to give users feedback when they clicked.
- Forms: Use clear, concise labels for each field and provide clear error messages.
- Menus: Should be intuitive and simple, include options relevant to the user's current task.
- Search bars: They are essential for easy navigation. Implement auto-completion for better user experience.
User Feedback & Recognition
| Interactive Element | Best Practice |
|---|---|
| Animation | Use subtle animation to provide feedback. Don't make it too distractive. |
| Notification | Use notifications to provide important updates. Ensure they are timely and relevant. |
| Scrolling | Use smooth scrolling features, ensure contents are loaded prior to being scrolled to. |
| Status Indicator | Use status indicators for tasks with clear beginning and end. |
Incorporate these best practices into your client-facing interface to improve client engagement and usability. Remember, the goal of interactive elements is to facilitate a seamless user experience, not complicate it. So, always keep user-friendliness and simplicity in mind while designing your interface.
Conclusion
Revamp The Visual Aesthetics
Personalise the aesthetic appeal of your interface by choosing a palette that matches your brand's personality. Upgrade the visuals using Retainr.io, a software that offers brilliant colour schemes, themes and font styles.
Intuitive Navigation
Ensure a streamlined user experience by designing an easy-to-navigate dashboard. Retainr.io can provide just that, with simple drag-and-drop functionality and intuitive design features.
Unique Branding
Implement your brand logo, name and tagline consistently across the client-facing interface. Utilise the whitelabel software Retainr.io to further enhance your branding efforts. Check it out here.
Incorporate Client Feedback
Listened to your clients' needs and preferences? Update your interface accordingly. Retainr.io prides itself on creating a customer-centred platform easily adjustable to client feedback.
Interactive Elements
Infuse dynamism by introducing interactive elements like sliders, pop-ups, or chatbots in the interface. The Retainr.io software can easily incorporate these elements to make your interface more engaging.
Integration of Helpful Features
Add helpful features to your interface like calendars, reminders, calculators to provide extra value. Retainr.io offers many of these features that can be intuitively embedded.
Use Predictive Analytics
Your interface can learn from past user behaviours and offer smarter suggestions. Retainr.io is equipped with advanced analytics capabilities, reshaping the user experience.
Real-time Updates
Offer clients real-time updates about their orders, billing, and any other notifications. Use Retainr.io for seamless communication and tracking.
Tight Security
Ensure your client-facing interface offers robust security features to safeguard sensitive client data. Retainr.io guarantees high-level security to put your clients at ease.
Scalability
Ensure your interface is ready to accommodate growth. Upgrade to Retainr.io, built for scalability, to keep up with increasing demand.
For more details, visit www.retainr.io and explore how Retainr.io can be a game-changer in customizing your client-facing interface.
Boost Your Agency Growth
with Retainr Accelerator
Uncover secrets, strategies, and exclusive blueprints to take your agency's growth to the next level — from marketing insights to effective presentations and leveraging technology.

SOPs, Cheatsheets & Blueprints
Leverage 50+ SOPs (valued over $10K) offering practical guides, scripts, tools, hacks, templates, and cheat sheets to fast-track your startup's growth.
Connect with fellow entrepreneurs, share experiences, and get expert insights within our exclusive Facebook community.
.jpg)
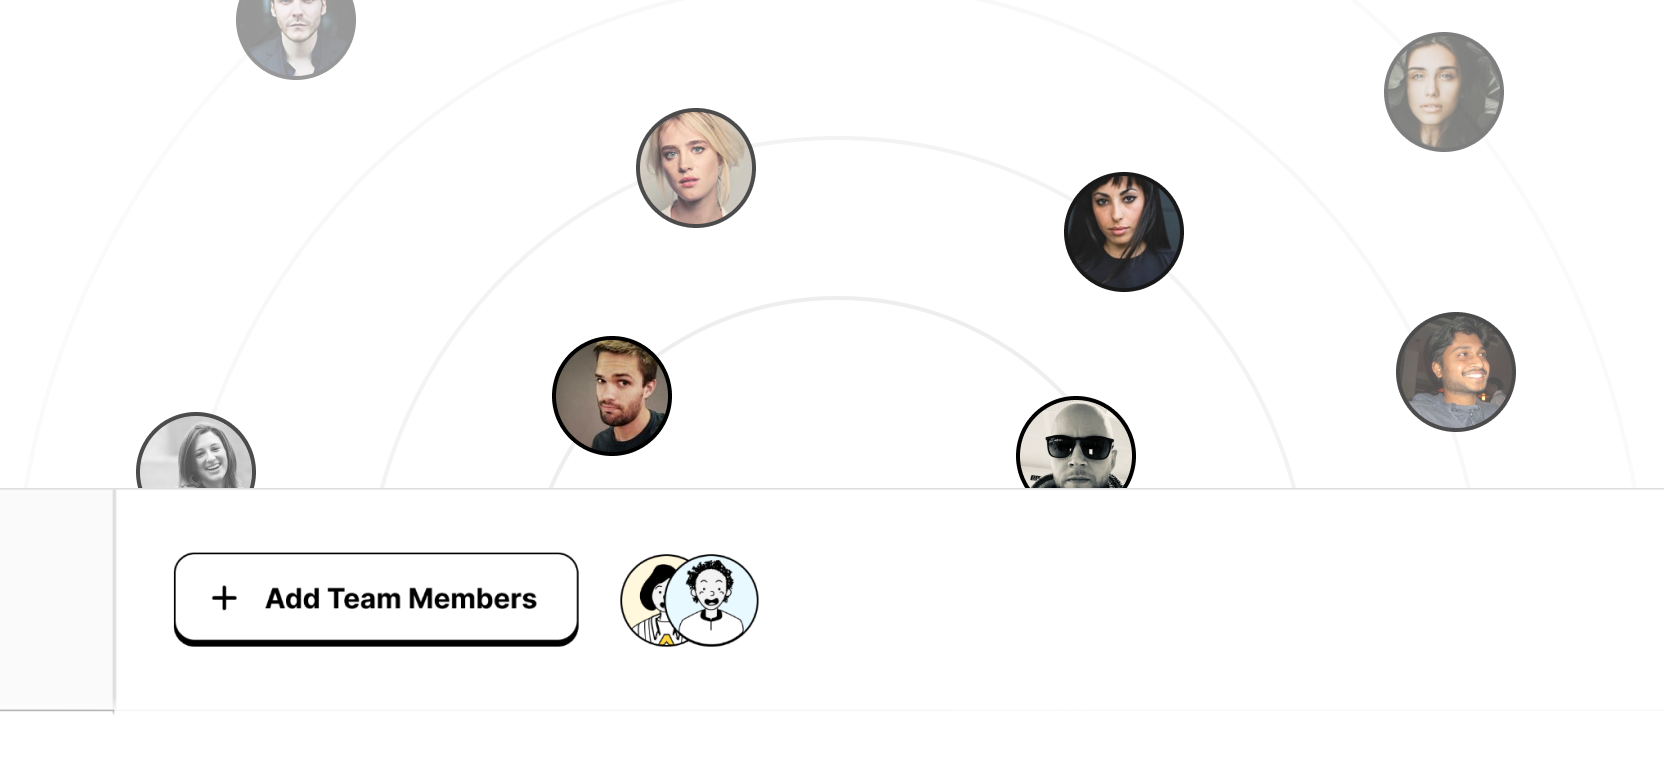
Join a thriving community of growth hackers. Network, collaborate, and learn from like-minded entrepreneurs on a lifelong journey to success.
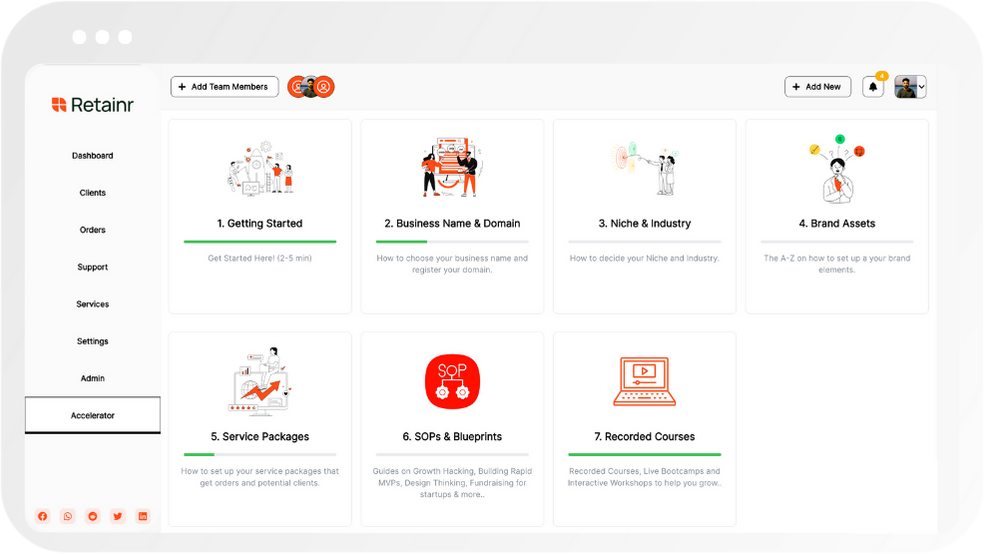
Gain expertise with recorded Courses, Live Bootcamps and interactive Workshops on topics like growth hacking, copywriting, no-code funnel building, performance marketing and more, taught by seasoned coaches & industry experts.

.jpeg)


